Why Don't We Use More Ram Disks?
Ram disks exist! We can leverage this for so many more workloads!
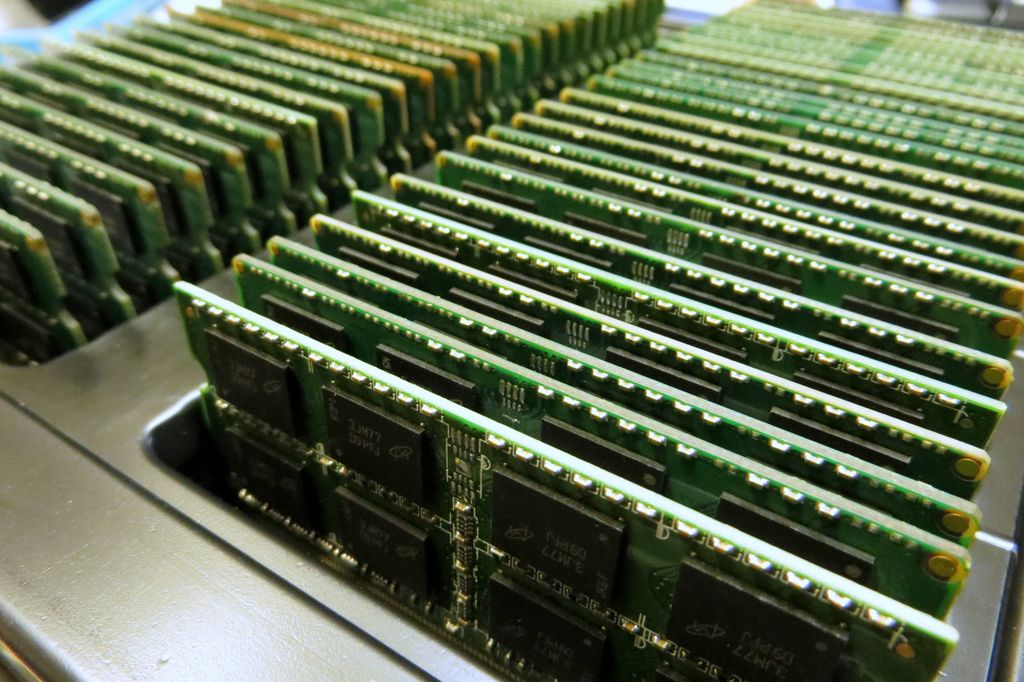
Fig. 1. 200GB of Ram Pete a render farm shared in 2015 on Wikimedia
Source: Adapted from [1]
Scope
The overall topic of disks, storage, transfer protocols, file systems, and a whole host of other complexity surrounds this conversation. Today, I just want to focus on ram disks.
Disks in RAM?
Ram Disks are storage drive filesystems that can benefit some high disk workloads but also come with some big draw backs. There are many situations where ram disks make a great deal of sense. Considering the cost of enterprise solid state storage disks, ram disks can help offset the marching write death to your solid state storage devices by taking a great deal of load off the device. We can use that to our advantage!
Ram-ification of Cost
At the time of this writing, ram has skyrocketed in cost due to market forces and neural network hype. If you didn’t have the foresight to load up on your own precious sticks of ram prior to this event, there is no need for fomo. This is not the first time that sharp price increases have happened on memory and trends usually come back down to earth within a year or two. Unlike GPU’s that have inspired versatility in many unexpected technology breakthroughs, memory is necessary for every device, it’s a commodity. My recommendation, fiddle today, and then build this knowledge in as a serious tool so you might leverage that for the future.
Why would I want to do this?
| 👍 Pros (Advantages) | 👎 Cons (Drawbacks) |
|---|---|
| Increased Speed: Minimal seek time (ideal for random I/O). | Volatile Data: Data is lost immediately on power loss or reboot. |
| Reduced Wear: No physical writes to permanent storage media. | Limited Capacity: Constrained by the amount of physical RAM available. |
Easy Setup: Often configurable with a single command (tmpfs in Linux). | Memory Contention: Uses up system RAM needed by other applications. |
| Silent Operation: Zero noise (useful for quieter homelab!). | No Error Correction: Potential for silent data corruption (less common). |
What about ECC RAM?
Hey big spender! ECC (Error Correcting Code) memory absolutely provides some error correction and mitigates that risk. If ECC is available to you? Great! If not, the consequences should not be serious given that we should only choose ram disks for data that we aren’t serious about storing long term. I use ECC myself in some applications of my homelab but that does not influence my excitement or fear toward potential applications for ram disks in the least.
The golden rule I want to install in you with is this. We never use RAM disks for data we care about preserving even if it’s just for a short period.
Sequential vs Random Access
It’s important to recognize what kinds of tasks may warrant your limited amount of memory available. To understand that better, we don’t have to be silicon scientists, but we do need to have a layman’s understanding of how data makes its way onto a device. We’re going to go back to some basics here for the people in the back.
Sequential Access
This is similar to writing a letter. Letters get written in a linear fashion until the work is completed. Just like writing data clusters on a hard drive. Data is written to disk cylinders on file storage in order as neat little block clusters. Think about copying a large file from one disk to another without any fancy network protocol optimization. I send one byte, you store one byte, I send the next byte etc. This is what may make mechanical hard disks the ideal choice for sequential archival data because of the lower cost per gigabyte and there are benefits to reading sequential data more quickly even on mechanical disks. Similar to the needle of a record player, hard drives benefit from staying in a groove and reading data in order by nature of their mechanics. Solid state storage is also excellent for reading at higher speeds but you can’t beat that lower cost of storing a lot of data.
graph TD
    subgraph Sequential Access
        A[Start Write] --> B(Data Block 1)
        B --> C(Data Block 2)
        C --> D(Data Block 3)
        D --> E(Data Block 4)
        E --> F[Finished]
    end

    style B fill:#66BB6A,stroke:#388E3C,stroke-width:2px;
    style C fill:#66BB6A,stroke:#388E3C,stroke-width:2px;
    style D fill:#66BB6A,stroke:#388E3C,stroke-width:2px;
    style E fill:#66BB6A,stroke:#388E3C,stroke-width:2px;
Random Access
When we talk about random access writing to storage devices. There is typically a lookup table that provides the position information and some fancy functions. For our purposes, think of it as similar to seeking information on a table of contents for a large document. You may have to return to that table of contents several times for seeking random information throughout the document. In short, random access takes additional time and “processing” to recall data.
graph TD
    subgraph Random Access
        G[Start Write] --> H(Data Block A)
        H --> I(Jump/Lookup Required!)
        I --> J(Data Block B)
        J --> K(Jump/Lookup Required!)
        K --> L(Data Block C)
        L --> M[Finished]
    end

    style H fill:#66BB6A,stroke:#388E3C,stroke-width:2px;
    style I fill:#0178d4,stroke:#388E3C,stroke-width:2px;
    style J fill:#66BB6A,stroke:#388E3C,stroke-width:2px;
    style K fill:#0178d4,stroke:#388E3C,stroke-width:2px;
    style L fill:#66BB6A,stroke:#388E3C,stroke-width:2px;

    classDef jump fill:#FFEB3B,stroke:#FBC02D,stroke-width:2px;
    class I,K jump;
Practical Implementation (Beginner)
On Linux this is fairly straight forward. We can create a temporary drive that does not survive reboots. First we create a mount point folder and then assign it as our ram disk using the tmpfs file system.
sudo mkdir /mnt/ramdisksudo mount -t tmpfs -o size=10M tmpfs /mnt/ramdiskCheck Our Work
We can check that the drive exists and its free space by running the following:
df -hExample Output
The output will look something like below. I use this system for “extracting Linux ISO’s”. 😉. Now if I were to extract those linux ISO’s to the drive and then move them? That’s two seperate large write jobs per ISO. So instead, we write it to our ram and then move the contents to their final destination.
root@localhost:~# df -hFilesystem Size Used Avail Use% Mounted onrustpool/subvol-308-disk-0 300G 12G 289G 4% /none 492K 4.0K 488K 1% /devtmpfs 378G 0 378G 0% /dev/shmtmpfs 152G 148K 152G 1% /runtmpfs 5.0M 0 5.0M 0% /run/locktmpfs 378G 0 378G 0% /tmptmpfs 1.0M 0 1.0M 0% /run/credentials/systemd-journald.servicetmpfs 100G 0 100G 0% /mnt/ramdisktmpfs 1.0M 0 1.0M 0% /run/credentials/systemd-networkd.servicetmpfs 1.0M 0 1.0M 0% /run/credentials/console-getty.servicetmpfs 1.0M 0 1.0M 0% /run/credentials/container-getty@2.servicetmpfs 1.0M 0 1.0M 0% /run/credentials/container-getty@1.servicetmpfs 76G 8.0K 76G 1% /run/user/0Practical Implementation (Intermediate)
We can take this even further by using feature flags. Here’s a quick summary of what is commonly available.
tmpfs Filesystem Mount Options
The tmpfs filesystem supports the following mount options:
| Option | Value Syntax/Example | Description |
|---|---|---|
size=bytes | size=4g, size=256m, size=80% | Specifies an upper limit on the size of the filesystem. Given in bytes, rounded up to pages. Suffixes k, m, g are supported (KiB, MiB, GiB). A % suffix limits it to a percentage of physical RAM. Default is size=50%. |
nr_blocks=blocks | nr_blocks=100m | Specifies the upper limit in blocks, where a block is PAGE_CACHE_SIZE. Suffixes k, m, g are supported. Percentage (%) suffix is not supported. |
nr_inodes=inodes | nr_inodes=1m | The maximum number of inodes for this instance. Suffixes k, m, g are supported. Percentage (%) suffix is not supported. |
mode=mode | mode=0755 | Set initial permissions of the root directory. |
gid=gid | gid=1000 | Set the initial group ID of the root directory (Since Linux 2.5.7). |
uid=uid | uid=1000 | Set the initial user ID of the root directory (Since Linux 2.5.7). |
noswap | noswap | Disables swap for this instance. (Since Linux 6.4). By default, swap is enabled. Remounts must respect the original settings. |
huge=huge_option | huge=always, huge=advise | Set the huge table memory allocation policy for all files (if CONFIG_TRANSPARENT_HUGEPAGE is enabled). |
mpol=mpol_option | mpol=bind:0-3,5, mpol=interleave | Set the NUMA memory allocation policy for all files (if CONFIG_NUMA is enabled). (Since Linux 2.6.15). |
Details on Complex Options
Huge Page Policy (huge=huge_option)
Requires CONFIG_TRANSPARENT_HUGEPAGE to be enabled.
huge_option | Description |
|---|---|
never | Do not allocate huge pages. (Default) |
always | Attempt to allocate huge pages every time a new page is needed. |
within_size | Only allocate huge pages if they will be fully within i_size. Respects fadvise(2) and madvise(2) hints. |
advise | Only allocate huge pages if explicitly requested with fadvise(2) or madvise(2). |
deny | Emergency option to force the huge option off from all mounts. |
force | Force the huge option on for all mounts (useful for testing). |
NUMA Memory Policy (mpol=mpol_option)
Requires CONFIG_NUMA to be enabled. nodelist is a comma-separated list of nodes (e.g., 0-3,5,7).
mpol_option | Description |
|---|---|
default | Use the process allocation policy (see set_mempolicy(2)). |
prefer:node | Preferably allocate memory from the given node. |
bind:nodelist | Allocate memory only from nodes in the specified nodelist. |
interleave | Allocate from each available node in turn. |
interleave:nodelist | Allocate from each node in the specified nodelist in turn. |
local | Preferably allocate memory from the local node. |
My Recommendation for Most Situations
sudo mkdir /mnt/ramdisk/sudo mount -t tmpfs -o defaults,noexec,nosuid,nodev,size=10M tmpfs /mnt/ramdisk/tmpfs Mount Options Used
Here is a table of the options broken down that take advantage of both the mount and tmpfs options. This offers additional security. Read the table below.
| Field | Value | Description |
|---|---|---|
| Filesystem (Device) | tmpfs | Specifies the filesystem type is tmpfs (Temporary Filesystem), which is an in-memory, volatile filesystem backed by RAM and Swap. |
| Mount Point | /mnt/ramdisk/ | The directory where the tmpfs will be mounted. Files saved here are stored in memory. |
| Filesystem Type | tmpfs | Confirms the filesystem type is tmpfs. |
| Mount Options | defaults,noexec,nosuid,nodev,size=1G | A comma-separated list of options: |
defaults | Includes the standard options: rw (read/write), suid, dev, exec, auto, nouser, and async. (Note: Some of the following options override the defaults). | |
noexec | Security: Does not allow execution of binaries in this filesystem, preventing a user from uploading and running malicious executable files. | |
nosuid | Security: Prevents SUID (Set User ID) and SGID (Set Group ID) bits from taking effect, which blocks unprivileged users from gaining elevated permissions. | |
nodev | Security: Does not interpret character or block special devices, preventing users from creating and exploiting device nodes (like /dev/null) within the mount. | |
size=1G | Limit: Sets the maximum size this tmpfs instance can grow to. It will use up to 1 Gigabytes of system RAM and/or Swap space. | |
| Dump Flag | 0 | Specifies the filesystem should not be backed up by the dump utility. |
| Pass Number | 0 | Specifies the filesystem should not be checked by fsck at boot time. |
Make This Disk (Not Data) Persistent Across Reboots
To turn this into a disk that returns on every reboot, we can add it it to the /etc/fstab so that it re-runs the mount on bootup.
sudo nano /etc/fstab# Our 1GB ram disk accessed in /mnt/ramdisk foldertmpfs /mnt/ramdisk/ tmpfs defaults,noexec,nosuid,nodev,size=1GB,mpol=local 0 0Advanced Examples
Some more advanced and 3rd party examples to consider.
Storing librenms Graphs In Ram
Librenms is a monitoring application that perpetually writes graph data for tracking SNMP, networking, and service data. This can mean a whole lot of disk writing all day and night. If you aren’t running enterprise grade disks, this can wear out your flash storage extremely quickly. Now, depending on how many client devices you are monitoring it may be more worthwhile to keep this data writing into ram. Does that mean you should just lose your graph data anytime the monitoring system has to restart? Hell no!
With some clever bash scripting we can move that data out of memory to a disk on shutdown and restore it to disk on boot.
I’ve written systemd scripts, and a full explanation on github.
https://github.com/bradgillap/Script-Bank/tree/master/bash/librenms 🔗
Saving your Proxmox Disks
It’s very common for people to only realize too late just how much additional disk writing ZFS or Copy on Write (CoW) systems use. On its face, these things are described as “don’t copy until you have to!”. In reality, there are significantly higher disk writes compared to traditional overwrite file systems like NTFS or Ext4.
Wait, How can That Be?
These systems are very performant and have significant gains over more traditional file systems but here is what’s typically happening that can cause more writing than expected.
Tree Recursive Data Updates
So if you use snapshots, there are chain reaction affects where a new data block is written and the pointer to that block now has to change. Except that change propagates up a nesting tree of snapshot of data. So that data cannot be simply written in place once and requires several writes. A new version of the metadata block must also be written.
Not Writing Entire Chunks
Record Size. CoW systems like most file systems operate on a specific record size blocks for data. Typically 128k. If an application writes a 4k chunk of data, but the filesystem record size is 128k, then the file system must read the entire existing data chunk to figure out where to modify it. It Then will ,odify the 4k chunk in ram and write the brand new 128k record to the new location as a full 128k rather than just updating the 4k alone.
Fragmentation
The last concern is fragmentation and garbage collection. ZFS in particular does not line data up nicely, it rather just tries to find any free place to stuff data into on the drive. This can lead to high fragmentation over time. It’s also why you should never buy SSD drives that do not support functions like autotrim as they will be doomed to run slowly after a period without a full erase.
This fragmentation can cause additional read/writing or hunting in write amplification. There are better posts on the Internet if you wish to learn more about this subject but for the sake of making a case as to why it’s bad. Just know that it’s bad.
What Will Help?
Proxmox in particular has many adjustments that can be made to improve this situation. Ideally the best solution is to simply buy more expensive drives and move on. This is fine in business because our risk tolerance is very low (usually) and our time more valuable but for self hosting, we often wish to keep our costs down. Or maybe you work in a non profit. Whatever the reason you’ll see a lot of judgement online for these tricks but they actually do work and increase lifespan of devices. My only conclusion is judgement comes from some sort technical piety of high grounding from those that have already learned their lessons, and maybe upset that the gate keeping of cost isn’t such a big deal. Which, whatever that’s their problem. Here’s what we are going to do.
Log2ram
Install log2ram to move all of the logs into ram.
https://github.com/azlux/log2ram 🔗 [2]
This thing is simply awesome. It does exactly what it says. Moves all the logs for the system into ram. Works on any system with SystemD and was originally intended for raspberry pi’s. So you know it’s efficient.
They even have their own apt repository!
Haiyaaa, Is it Stable though?
This comes with the same issues as ram disks. If you have sudden unexpected power loss, you will lose logs out of memory. Does it usually matter in homelab? That’s a question you need to ask yourself. For the girls I date, it doesn’t. Logs are perpetually generating and you can always make some new ones.
The only other minor problem I ran into is that it defaults to 500mb ram for its ram disk which fills up quickly. That’s easy enough to adjust.
First install ncdu and run it while viewing the logs folder to get a sense of what is using so much data. this ncdu tool is just a nice CLI way to browse files and see their sizes. If you’re more of a CLI purist, feel free to use df and du.
sudo apt updatesudo apt install ncducd /var/logsudo ncduOnce you’ve identified which logs are taking too much space. We can change the configuration for logrotate to happen sooner or under different criteria. The default is typically 7 days but we can change that to a determinate size on disk or in our case, size in ram.
We should be able to locate the configuration file for our log in this folder and edit it in the following way:
ls -a /etc/logrotate.d/nano /etc/logrotate.d/pveHere is an example configuration for controlling the logs. I’ve already made the adjustments by removing 7 days of logs and changing the rotation to 1.
/var/log/pveproxy/access.log { # Rotate when it hits 32MB, regardless of the time of day size 32M # Keep only 1 rotated log (access.log and access.log.1.gz) rotate 1 missingok compress # Removed delaycompress to free RAM immediately notifempty create 640 www-data www-data sharedscripts postrotate /bin/systemctl try-reload-or-restart pveproxy.service /bin/systemctl try-reload-or-restart spiceproxy.service endscript}To What End?
Well regardless of the purists. I have managed to slow progression of SSD drive death down from months years into the future. That is a significant amount of time to buy yourself for making better hardware decisions or accumulate more resources to create those opportunities for yourself.
References
[1] User:Pete, "200GB of Ram Pete a render farm shared in 2015 on Wikimedia," *Wikimedia* 2015. [Online]. Available: https://commons.wikimedia.org/wiki/File:Project_365_-322-_181115_Memories..._(22500113713).jpg Accessed: Dec. 11, 2025.
[2] azlux, "Log2Ram Github Project," *Github* 2024. [Online]. Available: https://github.com/azlux/log2ram Accessed: Dec. 16, 2025.